Leaving Grow Lights On 24 Hours: Right Or Wrong? -Part I

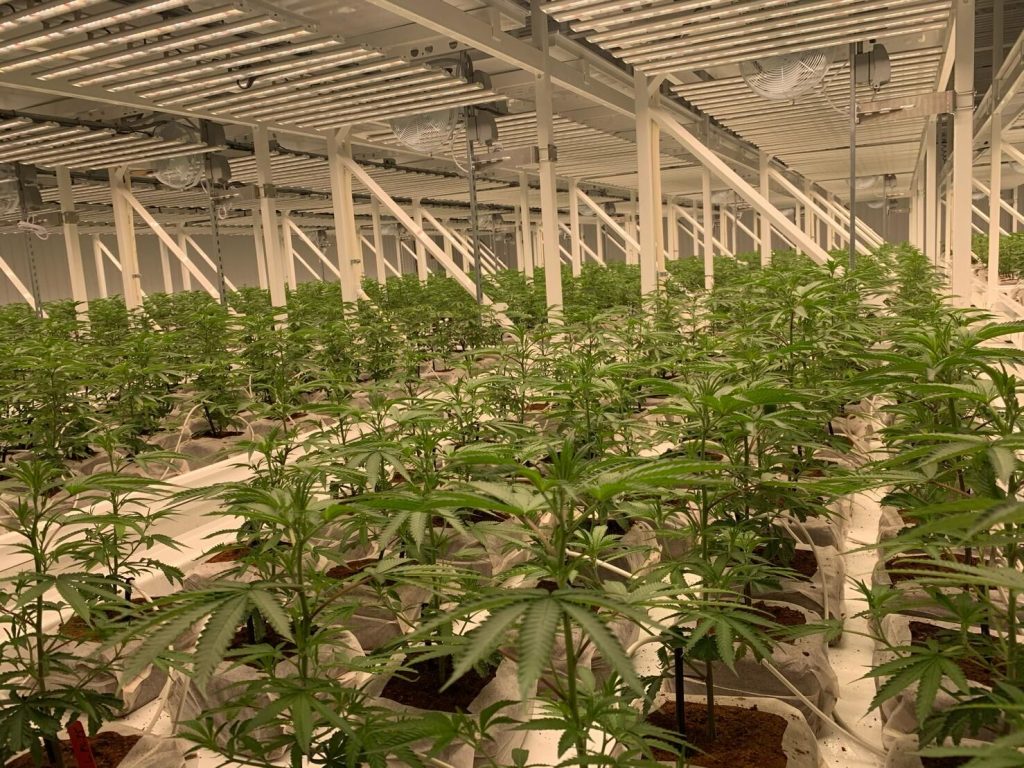
Leaving grow lights on 24 hours a day makes a lot of sense. More light means more growth and more yield, after all. Or does it? There is no question that leaving your lights on longer results in faster growth. But does it actually increase yields? Or does it hurt them? It’s actually something in between. But there’s a lot more to it than that. Let’s dive into this surprisingly complicated question and find out whether your plants would benefit from 24 hours of daylight.

Leaving Grow Lights On 24 Hours

Running your lights 24/7 gives your plants more light. If you find they are not getting enough, this is a simple solution to increasing the amount of light they get throughout the day. But it is not the best solution. If your plants need more light, the best way to remedy the situation is to get more light fixtures, or to swap your existing ones out for more powerful ones. Leaving your lights on continuously is not a good idea. Let’s look at the pros and cons to find out why.

Advantages Of 24/7 Lighting

Keeping your lights on 24/7 has one advantage: it gives your plants more light (ok, there is one other advantage: you won’t need any grow light timers). More light means faster growth. If you leave your lights on around the clock during vegging, you will see faster growth, without a doubt. And you plants will start growing buds much sooner.  But this benefit is outweighed by the disadvantages.

And leaving the lights on around the clock during flowering is not an option at all. Your cannabis plants won’t switch to flowering unless you reduce the lights to 12 hours a day.

If they are already flowering and you increase daylight to 24 hours, you’ll have a disaster on your hands. Your plants will revert back to the vegging stage and it will take forever to get them to re-enter the flowering stage. Never leave your lights on around the clock during flowering.

Disadvantages Of 24 Hour Daylight

The disadvantages of leaving your grow lights on 24 hours outweigh the one advantage. The primary disadvantage is that your plants get no rest period.

No Time To Respire

Sure, you can leave the lights on all the time. Your plants will grow faster. But if you leave them on continuously for many days, your plants will get weaker and weaker. They won’t grow as strong and they will become more susceptible to disease.

Think of it this way. As humans, we can stay up all night without any sleep. We get more done. And we can do it a few days in a row. But the longer we go, the weaker we get. We really need to get some sleep. Similarly, your plants need their rest.

During the daylight hours, marijuana plants (like all plants) use photosynthesis to convert carbon dioxide and the light from the sun, or from artificial grow lights, into sugars. At the same time, they release oxygen. And they are also respiring at the same time. When they are bathed in light, plants mostly photosynthesize, and only respire a little. When in darkness, they halt photosynthesis and focus solely on respiring. They need this to grow properly. When they respire, they metabolize the sugars created during photosynthesis into energy. They use that energy along with oxygen and nutrients from the soil to power various life processes.

Additional Costs

Running your lights 24/7 costs more money. You need to pay for the electricity to power the lights, and also for the electricity to power fans, air conditioners and any other equipment you might have running in your grow tent/grow room.

Additional Stress On Equipment

Leaving the lights on all night long also means that they, and other equipment, are running constantly, without any breaks. This puts additional stress on them and results in a shorter lifespan.

Additional Heat

Running your lights constantly generates more heat. As mentioned, this means you will also need to run fans and other cooling equipment 24/7. It also means your plants do not get a cooler night time, which is something they naturally expect.

Growing Tomatoes Indoors With Artificial Light: Good Idea?-Part II

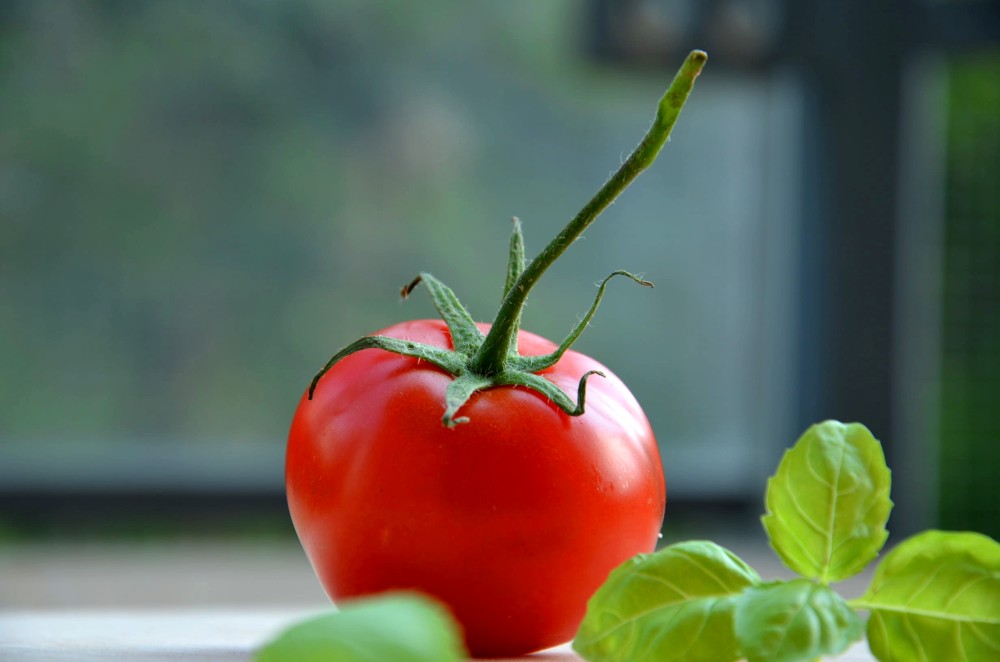
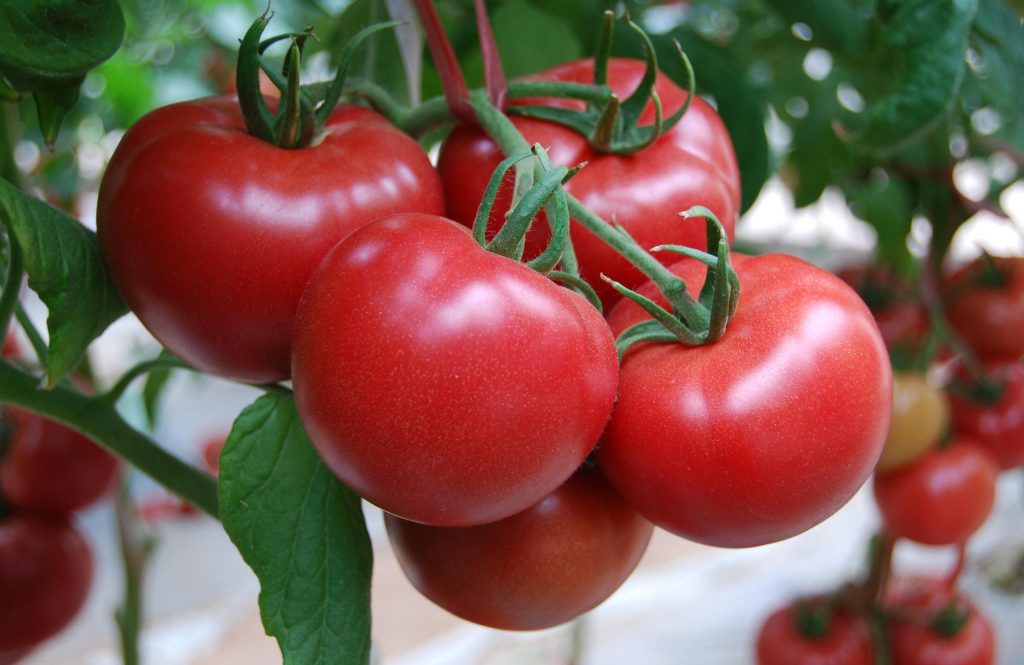
Now we all know that growing tomatoes indoors with grow light is a good idea. But how to grow it?

How To Grow Tomatoes Indoors

Tomatoes are not the easiest plant to grow successfully, whether outside in the garden or in a spare room. You will need to be committed to this to be successful, because there will be challenges along the way. Of course, a successful tomato harvest makes all the hard work worth the effort.

Choose The Right Tomato Variety

You will need to be well-versed in the needs of the different tomato varieties to choose the best one to grown in your situation. For example, there are tomatoes that bush out and some that grow on vines. You will need to determine which works best with your space.

Determinate Tomato Plants

Determinate tomato plants produce all their tomatoes at the same time. This variety gets its name because you can predict, or determine, how much it will produce.

Indeterminate Plants

This is the vine-type plant that continues to grow all season and keeps producing more tomatoes. It will produce an indeterminate number of tomatoes, because you never know how big it will get. Most hobbyists opt for determinate tomato plants indoors, because they are easier to predict and control.

Choose Your Potting Mix

As discussed earlier, it is best to get a sterile potting mix that does not have fungi or other undesirable ingredients. More important than sterility is that the soil is a variety that is good for drainage. A good coarse potting mix with ample drainage is crucial to setting up your tomato plants for success.

Pot Your Seeds Correctly

Using your egg carton or seed trays, place the potting mix into the trays. Then take 2 seeds and bury them about ¼ inch down into your soil in each tray or egg carton recess. Now take a water sprayer and mist all your trays and cover them up to keep the humidity in. Try to keep your seeding trays or egg cartons at about 63° Fahrenheit, or as close to it as you can. Maintaining the correct temperature is critical for germination. If all goes well, you should see little sprouts starting after two weeks or so.

Transplant Your Sprouts To Pots

After your seeds have begun to sprout and reached just about 2 inches tall, it is time to move them into a bigger container. To have a happy plant, your container needs to be a minimum of 12 inches deep, or the roots will not have enough space to expand.

Place Your Pots

At this point you need to make sure your pots are positioned in such a way that they can drain efficiently and have plenty of exposure to your light source. If you have several pots in the room, make sure each one has plenty of space around it for the bushes or vines to expand. Nobody wants to be crowded, and a corner is never a good place for a tomato plant. Place them with open air on all sides and several additional inches of space for expansion.

Growing Tomatoes Indoors With Grow Lights: Final Thoughts

Even if you live in an area with a suitable climate for tomatoes, you may still want to grow them indoors. Doing so means you have full control over everything.

Your plants are not at the mercy of the weather and other external factors. In addition, you can harvest tomatoes year-round from an indoor grow. Outdoors, you only get one harvest per year.

Growing Tomatoes Indoors With Artificial Light: Good Idea? -Part I

Growing Tomatoes Indoors With Artificial Light: Good Idea?

This is not a trick question, and there is a simple answer. Yes, it’s a great idea!

If you do not have access to an outdoor garden and you want to grow some tasty healthy tomatoes, grow them indoors! With the convenience of science and modern technology we can now do things that were impossible years ago.

What You Will Need

Here is what you will need to successfully grow tomatoes indoors using plant grow lights.

A Good Space

A room in your house with a window would be best. If you do not have a window room, any room will do, since you are going to use artificial light. Tomatoes love natural sunlight, so if you can provide this, it is a bonus. It also saves you on your electric bill, since you won’t need to use as much artificial light. Your growing room needs to have ventilation. A fan with a cracked door is fine, in most cases. The room also needs to have power outlets for your grow lights, and other equipment you may need (like the fan).

Seed Trays

You can purchase seed trays from any home improvement store, or from online stores. They do not cost much money. You can also make do with egg cartons if you want to do it on the cheap. The seed tray or egg carton is used to get the seeds started from nothing to germination.

Water Source

This goes without saying, but plants like tomatoes need water. No list of materials would be complete without mentioning this, so we included it on this list. Water you have on tap will do the trick, unless it is especially hard or contaminated.

Heating Mat

This is not 100% necessary, but is well worth the investment. A heating mat significantly speeds up the seed germination phase, which always feels a bit like watching water boil.

Special Non-Soil Planting Mix

The important points here are the following:

  • Must be sterile
  • Must not contain garden or topsoil

Tomatoes are vulnerable to the fungi that common dirt and soil contain. Since you are growing them indoors you have a great opportunity to control the environment! Get sterile soil-less planting mix and thank me later.

Grow Light(s)

Since tomatoes need 8 hours of direct sunlight per day to grow, LED light is a good option, it works great. Now more and more people will use LED grow lights for indoor growing, which is a trend. There’re some grow light options on our store, check it out: Shop

Stakes

The stakes help your plants grow upward and give them a surface to grab onto to get more light into their leaves. If you are growing a bigger garden, you can use trellis or even a cage. This gives the vines more surface area to cling to and exposes more leaves to the direct light for maximum photosynthesis.

Large Plant Containers

Depending on how many plants you are going to grow inside, you may need only one pot. Or you might prefer a different kind of container, if you are growing many plants. You can purchase planting troughs or extra big pots online for not too much money!

When To Stop Watering Before Harvest

We generally recommend keeping things simple. At least on your first grow or two. After that, go ahead and start experimenting with some of the millions of tips you find online. One of the most common tips is to withhold water in the last few days before harvest. Unlike many, this trick does have a positive effect. The big question is: when to stop watering before harvest. The advice you see varies greatly. There is a reason for this. We’ll get into that and everything else you need to know about withholding water prior to harvest.

When To Stop Watering Before Harvest

To get the best yield, some growers say you should stop watering your plants about 3 days before you plan to start harvesting the buds. Others swear they stop a week before harvest. The idea is to withhold water so the plants have a stress reaction like they do when a drought may be coming. They divert all their resources to reproduction, which results in bigger fatter buds.

How long before harvest is ultimately up to you and may be unique to your situation. The ideal amount of time differs from one plant to the next. Overall, 3 days to a week seems to be the accepted wisdom.

Why Does Withholding Water Before Harvest Work?

There is a natural response in cannabis and many other flowering plants, where the plant will divert all its resources to the flower when it senses stress coming.

This is a form of plant parenting, and it is hard coded into their genetic code. When cannabis is stressed, and already in the reproduction phase (flowering), it will put all its effort into saving the buds.

Withholding water for a period before harvest is a severe form of stress to put on a plant that is used to getting watered regularly, and it produces a severe response.

Growers all agree that this tactic of stressing the plants by holding back the water makes a big difference in the size and density of the final bud harvest.

Depending on your strain of plants, you may need to adjust the drought period from between 3 days to a week. Each strain is a little different and has different requirements, but a week is a safe bet for all of them.

When To Stop Watering Before Harvest: Final Thoughts

The reason you see such varied answers regarding when to stop watering your weed plants before harvest is that the ideal time differs, depending on the strain and a few other factors.

That’s why we recommend keeping it somewhere in the rang of 3 days to 1 week for your first grow, and then adjusting from there. It will take you a few grows to get it perfect.

Of course, this assumes you are growing the same genetics each time. Either way, if you keep it in this range, you may not hit the exact perfect spot, but you will still see a marked increase in yield quality and quantity.

How To Water Cannabis Plants-Part III

We have discussed in detail how much water your cannabis needs and how to water it. In this blog, we want to share with you some additional information, such as how to collect runoff and how to water your cannabis when you go out.

How To Collect Water Runoff

Collecting water runoff serves as an effective and simple way to minimise overwatering. When you administer too much, plant pots can end up sitting in a pool of excess water that reduces aeration and gives pathogens favourable conditions to strike. Use the handy tips below to prevent this situation from arising.

  • Use Inclined Trays

The easiest solution? Gravity. By setting your trays at an incline, excess water will drain away from the containers and pool at the end of the tray. No, you don’t need any fancy gear. Place any spare waterproof item under the back end on the tray. You can use anything from water bottle caps to plastic lids. This gradual slope will allow water to run toward the front of the tray for easy removal.

  • How To Remove Water Runoff

What to do with all of that water pooling in your trays? Well, there are plenty of different ways to remove it. Check out a few below:

How To Water Cannabis Plants When You’re Away

There may come a time where you have to depart from your plants during the growing cycle. Sometimes vacations, commitments, and major events can force you to leave your plants for a period of time. While you can always leave the lights on and feed them before you leave, cannabis plants require water every few days.

If you’re away from the weekend, they’ll do just fine. But if you need to leave for longer, you’ll need to come up with a way to make sure their water demands are met. Check out some of the simple and creative ways below to keep your plants alive and thriving in your absence.

Budget Options

You don’t need to invest significant time and money into finding a way to sustain your plants. Cheap and simple options work just as well. Check out the three most effective ways to keep your plants watered while on a budget below.

  • Ask A Friend

Ask a trusted friend! Of course, you’ll need to ask somebody that you trust completely. You don’t want word spreading about your botanical hobby, and you definitely don’t want flowers going missing.

If possible, recruit a friend who has some growing experience. This way, they’ll know how much water to administer and when. If you’re asking a friend new to the growing world, be sure to educate them about under watering and over watering to avoid root rot and nutrient lockout.

When you’re back, thank your friend and be sure to share some of your harvests as a thank you for their hard work.

  • DIY Drip System

Drip systems are an excellent way to provide a slow and steady supply of water to your plants. Instead of gushing water into your soil every now and then, drips systems supply a constant yet tiny quantity of water that adds up and drains evenly over time.

Grab a used water bottle and make a couple of holes in the cap using a hammer and nail. Fill the bottle with water and replace the cap. Dig a hole in your container or garden bed and place the bottle in cap side first. This method will keep your plants hydrated for about five days.

  • Makeshift Greenhouse

Using a simple plastic bag, growers can create a temporary makeshift greenhouse that recycles the water that plants release through their leaves. Place four wooden stakes evenly spaced in each corner of your container to form a support structure. Next, water your plant well and place it somewhere out of direct sunlight.

Grab a large clear plastic bag and cover your plant, resting the top over the four stakes. Use a piece of string to loosely bind the opening of the bag to the rim of the container, still allowing air to pass through. The bag works to form condensation and rain the water back down into the soil, creating a continuous cycle.

  • Automatic Watering Stakes

If you prefer to keep things low-tech, you should consider watering stakes. These cool little devices feature a small stake and a tube that connects the stake to a small water reservoir. You can use any small container as a reservoir, from a glass jar to a plastic container. Unscrew the cap on the stake and fill it with water. Then, insert the cap into the soil and place the end of the tube into the reservoir.

The water will wick through the tube, into the stake, and throughout the growing medium to keep your plants hydrated while you’re away. Although simple, water stakes do a great job at striking a balance. They release moisture at roughly the same rate that plants draw it up, minimising the risk of overwatering.

High-Tech Options

If you have the money, why not splash out to keep your plants watered and your harvest safe? Some growers are willing to invest whatever it takes, and others simply enjoy geeking out on high-end growing products. Discover the two best high-tech option for keeping your plants hydrated while you’re away.

  • Irrigation System

Modern growers have the luxury of choosing from a wide range of irrigation products on the market. These devices use timers and controllers to water cannabis on demand. Tubing systems connected to a reservoir shuttle water to individual containers when and where a grower chooses. Some models are even wi-fi enabled and allow growers to change parameters via their smartphone.

  • Slow Drip System With Smart Timer

Slow drip systems with smart times are the high-tech version on the bottle trick explained above. These systems are super easy to put together at home and provide a constant trickle of water that keeps cannabis plants happy and hydrated.

Slow drip systems come with a hose, drip couplers, staples to keep the hose secured, and a hose timer. Growers can place the drip couples anywhere along the tube, enabling them to water individual plants spaced along garden beds and grow rooms. Simply set the start and endpoint on the timer to your preferred settings and you’re good to go.

Bottom Line — Water Well, But Not Too Often!

If you know how and when to water your plants, and are aware of any associated issues along the way, you can prevent most common cannabis growing problems. You will raise happy, healthy plants, and can look forward to fantastic yields!

Happy growing!

How To Water Cannabis Plants-Part II

From the last blog, we’ve learnt how much water should we poured on cannabis plants. But, do you know if your cannabis are thirsty? Let’s start with this topic:

How To Tell If Your Plants Are Thirsty

You now know about the factors that determine how much and how often cannabis plants need water, and how these factors can be different for everyone. So now, how can you tell exactly when you should water?

Here are some signs that your cannabis plants are thirsty:

  • Drooping, Weak Plants

If your cannabis plants are very thirsty, they will droop. The whole plant will appear rather sickly and lifeless, so it’s difficult to overlook this sign. One catch here though is that thirsty plants can look very similar to those that are drooping because of overwatering. The difference here is that the leaves of overwatered plants are usually dark green and form a “claw” where they curl and bend downwards, so the whole plant takes on a heavy and waterlogged appearance.

If you’re somewhat experienced, you should be able to tell these conditions apart. Most of the time, it should be obvious if the drooping is from over or under-watering: If the soil is bone-dry and you know you haven’t watered in quite some time, the sickly appearance of your plants is less likely from overwatering.

Tip: Know that slightly underwatering your plants is always better than overwatering. If you water thirsty, otherwise healthy plants, they should normally recover their appearance in a couple of hours. Occasional underwatering doesn’t usually have harmful consequences. Overwatering, on the other hand, is a silent killer.

  • Yellow Or Brown Leaves

Along with your thirsty plant wilting and drooping due to a lack of water, it may also display discoloured leaves in shades of yellow and brown. While it is perfectly normal for plants to develop yellow leaves during the final weeks of bloom, a healthy vegetating plant shouldn’t have any/many dry, yellow, or brown foliage.

  • Just Check The Soil

Take the guesswork out of your watering routine with a simple method. Placing the tip of your finger into the top 5cm of soil provides a good indicator of how dry the upper soil has become. However, it won’t allow you to detect the water content of the middle and bottom of the growing medium.

Weighing your pots instead will give you a clear picture of how much water remains. You can operate based on a general feeling of how your containers feel in your hands when they are dry compared to when they are saturated. Even better, weigh them to know exactly when they’re ready for some more H₂O.

How To Water Your Cannabis Plants

Here is a simple rule: Water less, but water well! Rather than giving your plants a little bit of water often, treat them to a healthy, less frequent soak. But how much water is sufficient?

A good soak means watering the medium to 25–33% of the pot capacity. This amount of water will provide the root system with all it needs, without causing pooling and potential fungal issues.

When watering, aim for the middle of the substrate first. After letting the roots breathe, water the edges of the container too. This approach will encourage the root ball to reach to the edges of the pot, and also shuttle nutrients sitting in the top of the medium down to the root system below.

This method will deliver the correct amount of water, without creating pools in the substrate. Excess water creates a humid environment—a perfect breeding ground for fungal pathogens that lead to root rot.

  • Don’t Leave Your Plants Sitting In Runoff

Along with your containers featuring holes at the bottom for water to escape from, the containers themselves should be lifted slightly off the ground so that all the water can drain and plants aren’t sitting in stale liquid. Drainage trays can catch this runoff, but should immediately be dumped after collection to avoid creating a breeding ground for bacteria, pests, and mould.

  • The Importance Of pH When Watering Plants

If you are growing cannabis organically in soil, you shouldn’t need to worry much about the pH level of your water/nutrient solution. But for the majority of cannabis growers who are using common mineral nutrients and grow weed in soil, coco, or hydroponically, the correct pH level of the water is very important.

The reason for this is that cannabis plants have a limited pH window where they are able to take in nutrients. If the pH level of the water is either too high or too low, the plants are unable to take in nutrients even if they are present, a phenomenon known as nutrient lockout.

When you grow in soil, the pH range of your water should be 6.3–6.8. If you grow soilless (e.g. coco) or hydroponically, the pH level needs to be even lower, 5.5–6.1. To test your water pH, use a pH measuring stick or pH measuring drops. If the pH is too high or too low, use some drops of “pH down” or “pH up” to adjust your water to the right level. Most of the time, if you’re using tap water, your pH will likely be too high.

Also, if you’re adding cannabis nutrients to your water, measure the pH after each feed. This will give you accurate data of how you have influenced the soil. It will also let you know if you need to add more nutes, or modify the dose during next feed.

How To Water Cannabis Plants-Part I

Watering cannabis plants seems like the easiest thing to do, yet many growers, especially those new to cannabis cultivation, make mistakes with watering. Overwatering is one of the most common reasons for all sorts of growing troubles such as nutrient deficiencies and cannabis diseases, although giving your plants too little water can also negatively affect their growth.

How Much Should You Water Cannabis?

One issue with watering plants is that it isn’t really an exact science, and many different factors contribute to how much you should administer. As an obvious example, as your plants get bigger, their watering needs will change. But there are other, more complex variables that also determine how much or little you should drench your plants. Let’s discuss some of the most vital:

  • Stage Of Growth

Cannabis plants have different watering demands depending on their stage of maturity. The specific guidelines we share below apply to mature vegetating and flowering plants. Seedlings and clones require much less water.

In the early stages, avoid watering your plants with a powerful stream that might knock them over and disturb developing roots. Instead, use a light mister to gently moisten the substrate.

Wait for the soil to dry out completely before repeating the procedure. How quickly the soil will dry will depend on your environmental conditions, but this roughly translates to misting once every 2–3 days.

  • Growing Medium

The type of growing medium you use largely determines how much water the soil can hold, and drainage plays a huge role in how often/how much you water your plants. Cannabis likes rich yet airy and “fluffy” types of soils that are well-draining. As another consideration, the growing containers themselves must have holes punctured in the bottom to allow the water to escape. More compact soil mixes will hold moisture much longer, so they require less frequent watering as a result. Otherwise, moisture can linger in the soil for some time, which can lead to nutrient deficiencies, root rot and fungus, pests, and a whole lot of other problems.

Here is a quick way to check if your water is draining properly: If it takes several minutes for water to drain after drenching the soil, and/or if it takes longer than 3–4 days for your soil to dry out, it’s likely that you have a drainage issue. Even if you don’t see adverse symptoms now, it could definitely lead to more problems down the line. In this case, you can add perlite or something similar to your soil to aerate the mix and improve its drainage ability. Perlite ensures that water doesn’t stay too long in your pot. The key to good soil for cannabis plants, whether store-bought or homemade, is to balance moisture retention with water drainage. This usually means soil that is dark and rich, but amended with perlite and/or other substances to promote a healthy and efficient medium for plants to grow.

  • Size Of Container

Then of course, the dimensions of your container will also affect the overall balance between moisture retention and drainage. If you have a tiny plant in a huge pot, drenching the whole substrate is going to drown the poor thing before it gets a chance to flourish. Similarly, you might experience the opposite issue with huge root-bound plants stuck in minuscule pots. This is also the reason that growers normally start seedlings in smaller pots, then up-pot them later as the plant grows. A small seedling pot makes it much easier not to overwater the sensitive seedling.

  • Outside Temps And Light Intensity

Cannabis plants don’t always grow at the same pace. A plant in a cooler environment, for example, will grow much slower than one under balmier conditions. Light intensity plays another big role here. Plants that receive more heat and light are bound to have higher water and nutrient requirements than those with meagre light and chilly temps. Check out amazing LED full spectrum grow lights here: Shop

  • Health Of Cannabis Plants

The general health and vitality of your plants will also determine how much water they require. If growth is slow or stunted, or if a plant is afflicted with diseases or pests, it will likely not need as much water as one that is thriving.

Things You Need To Know About Light Cycles

Many flowering plants, Cannabis among them, are what are known as “diurnal” plants – they use the cycle between day and night to trigger their growth patterns. This is important to understand when growing plants indoors so that your crop management takes this cycle into account.

There are two phases to the growth of most flowering plants: vegetative and flowering. The vegetating cycle focuses on establishing a solid root system, a strong main trunk, and ample foliage to absorb the light that’s essential to the photosynthetic process. If you’re starting from seed, you can get by with less light intensity until active growth starts; heat is more an issue. Keep the seed bed warm, but not hot, and give enough light to nourish the seedlings without scorching them.

If you’re starting seeds full-spectrum LED grow lights are a good choice because they give all the light needed without overheating concerns. Insufficient light will result in tall plants with long internodes, so don’t use a weak light that causes the seedlings to reach for it, creating “stretch.” LED Panel Plant Grow Light Full Spectrum Commercial Indoor

Once plants are established and in the vegetative phase, they require plenty of light in the right frequencies to stimulate growth. Outdoors, the sun provides more than enough light in all frequencies, but indoors, it’s up to the grower to give plants the quality of light they need. Leafy plants like Cannabis want a good amount of blue and red light in the proper wavelengths for optimal growth and bud production, and while mixing various light sources can approximate it, the simplest and ultimately most economical way is through the use of properly designed full-spectrum LED grow lights such as Aokairuisi LED grow lights featuring the Phyto-Genesis Spectrum. Shop

A lesser known and often overlooked process in plants is what is known as phototropism. It’s the process by which a plant locates its light source and turns toward it to gather the most energy. It’s triggered by blue light, and an insufficient amount will cause the plant to stretch toward the light source and become leggy and weak. This is an important consideration in your choice of lights because high pressure sodium (HPS) lamps don’t emit enough blue light for proper phototropism. You can solve this with metal halide lamps during the vegetative stage, but here again, full-spectrum LED lights eliminate the need to change light sources during the growing cycle, which has other benefits as well. 

While Cannabis plants don’t have a “sleep cycle” per se, many growers feel that at least some time in the dark lets them relax and catch up on some other processes that improve plant quality such as root development. At the minimum, Cannabis plants require less than 12 hours of dark to stay in the vegetative cycle, so a good approach is 18 hours on and 6 hours off during vegetation. At the very least, it will save considerably on energy used for lighting and ventilation with very little effect on plant growth.

The flowering phase in Cannabis is triggered by the light/dark cycle. It is started by changing your cycle to 12 hours on and 12 hours off. During this phase, the plants will continue to grow vigorously and require even more light because of their size. Some growers switch to HPS at this time because the plants need more red light than they did previously, but with full-spectrum LED grow lights, the need to change sources is eliminated, saving grow light time, bother, and money as well as the need to control the large amount of heat produced by HPS lamps.

Rather than bogging down in botany, keep your growing simple by following three guidelines: use full-spectrum LED grow lights for all cycles, keep them on at least 18 hours during vegetative growth, and cut back to 12 on and 12 off for flowering. Then sit back and enjoy your harvest.

What Is The Sea Of Green Growing Method-Part II

We introduced the sea of green in the last blog, if you’d like to learn about the steps about it, keep reading:

Step by step to achieve Sea of Green (SOG) for massive yields

Now you may be thinking that the sea of green method is a complicated and daunting cannabis growing technique. Far from it. SOG method is a simple, low-stress strategy with a few practical steps which, if followed, can successfully boost your CBD venture. Here are the five growing stages for a successful SOG growing method:

Prepare the Seeds or Clones

The first step is to germinate the seeds you want to use for SOG. Alternatively, you can source for other plant cuttings if you want to use the cloning method. Using clones for SOG is a better option because it helps you ascertain if the plant is of the same cultivar type and whether they can all grow similarly if the conditions remain constant. 

Prepare Space

Having settled on your desired plant type with seeds or clones ready, the next step is to prepare the grow space. Fill up several plant pots with the correct type of soil. Ensure the soil is enough to sustain healthy roots which go deep into the soil. 

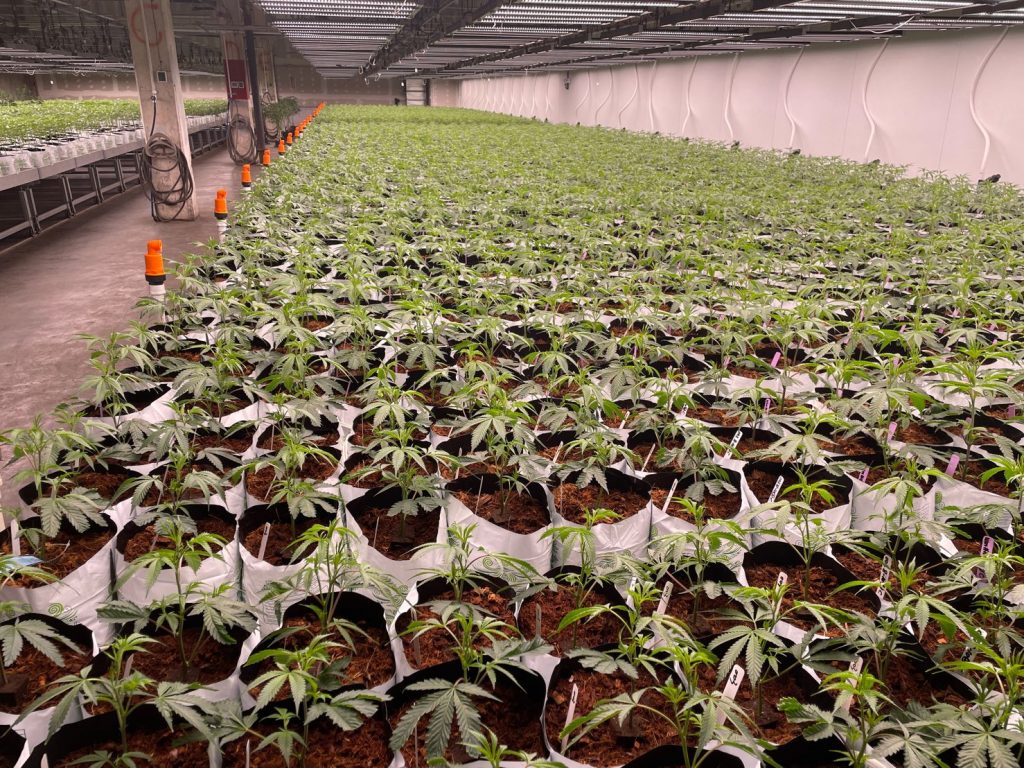
Ideally, the plant pots should be around 10-12 inches in diameter. Place at least two seeds or clones per pot per square foot, taking care not to overcrowd them. By not placing the plants too close together gives them ample surface area to develop seamlessly while minimizing the chances of the plants competing for light and nutrients. 

When plants compete against each other for survival, they become stressed. This is dangerous for your SOG crops. Stressed plants stagnate in biomass which results in low buds production and ultimately low yields.

Prepare Lighting

Once your plants have budded, it’s time to light up the grow tent with quality grow light. Shop You should provide an average of 18-24 hours of uninterrupted light per day until the plants are about 12 inches tall. Ensure that all the plants are of the same height to enable them to receive the same amount of light. This will minimize possible stunted growth among your crops and may result in little to no buds at all.

Give Extra Care in the Vegetative Phase

With everything set and your small THC and CBD plants proliferating under the grow lights, the next growing cycle for your crops is the vegetative stage. How long your crops stay in the vegetative stage largely depends on your preferences. 

Some cultivators will leave the plants lighted up for at least 18 hours a day until they reach around 25-30 cm or 10-12 inches in height. Others prefer to switch off the lighting phase after two weeks or when the plants are about six inches tall.

Switching off the lighting when the plants are under 6 weeks is highly discouraged. This is because the SOG-grown plants need to be at least two months to attain the flowering stage. Therefore, interrupting the vegetative stage can result in limited bud production and, ultimately, limited yield per plant.

Be Strategic

As your plants approach the end of the vegetative stage to usher in the flowering stage, you need to develop a delicate strategy that does not shock or stress your plants. Rather than switch off the lighting completely, reduce it to a minimum of 12 hours a day. Twelve hours of light and another twelve hours of darkness enable your plants to adjust accordingly and flower efficiently. 

Each plant will then develop a wide canopy of green flowers then channel their energy to producing one large cola. To mitigate the development of a possible hot spot, ensure the lighting is proportionally and evenly distributed away from the smaller plants. Also, trim off the underneath branches on the mother plant to preserve them as clones for your future SOG crops.

Harvest Time

Once the canopy is fully developed, and each plant has produced a single large cola, then it’s time to prepare for harvest. To know if your harvest is ready, check the condition of the trichomes of your buds. If they appear white and cloudy, then your sea of green plants are ready for harvesting.

What Is The Sea Of Green Growing Method-Part I

Growing weed indoors requires efficiency, limited growing space, and sufficient artificial lights. The expenses associated with these resources sometimes compel growers to minimize these resources and production time, boost yields and maximize supply and profits. 

For the past four decades, cultivators have invented and tried out different techniques to realize this objective. One outstanding technique that has grown in popularity within the marijuana cultivation industry is the Sea of Green (SOG) method.

What Does The Sea Of Green Mean

The sea of green method, otherwise referred to by its abbreviation “SOG”, is a simple method of cultivating several small cannabis crops together instead of a few larger ones to produce maximum yields within a limited growing space.

SOG entails moving your propagated THC and CBD plants into the vegetative stage within 3-4 weeks as opposed to the usual 4-6 weeks used in other techniques. After 3-4 weeks you can adjust lighting accordingly so the environment can sustain the flowering stage. As the canopy of buds closes in, you can improve airflow by trimming off the lower mature branches. Your SOG-grown crops should be ready for harvesting at this point. More details below.

The idea of the sea of the green method is that if small crops are grown together in a limisted growing space, they will most likely develop to half their average size, hence accelerating the cola development and flowering stage.

With this method, the small cannabis plants take less space and less time to flower, making it highly viable. Small THC and CBD plants are grown together in a small space form clusters of close quarters under quality grow lights. 

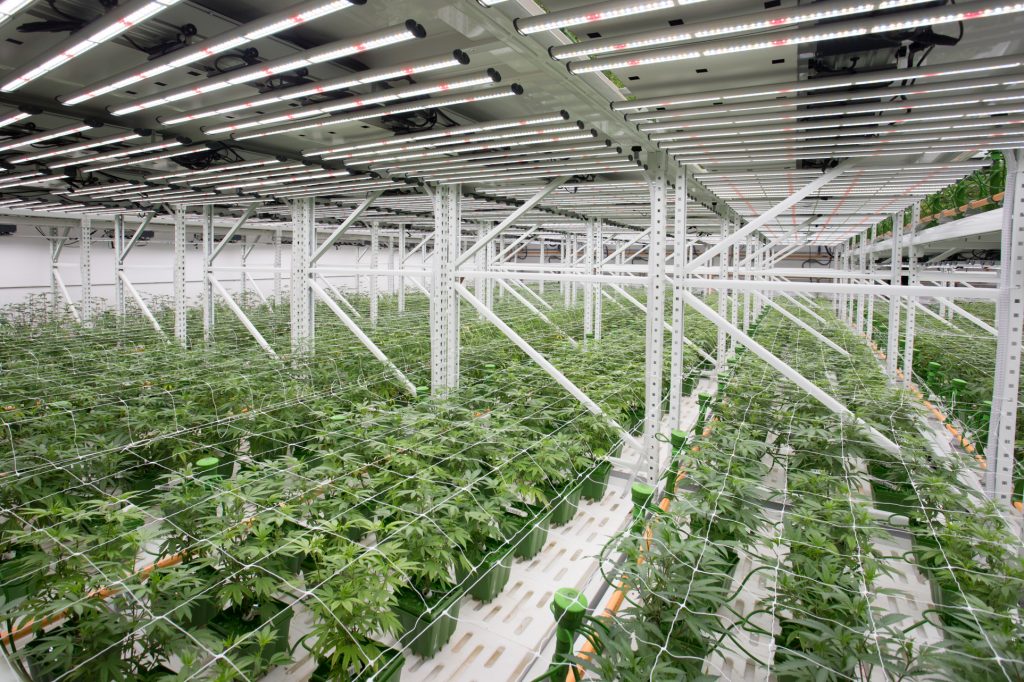
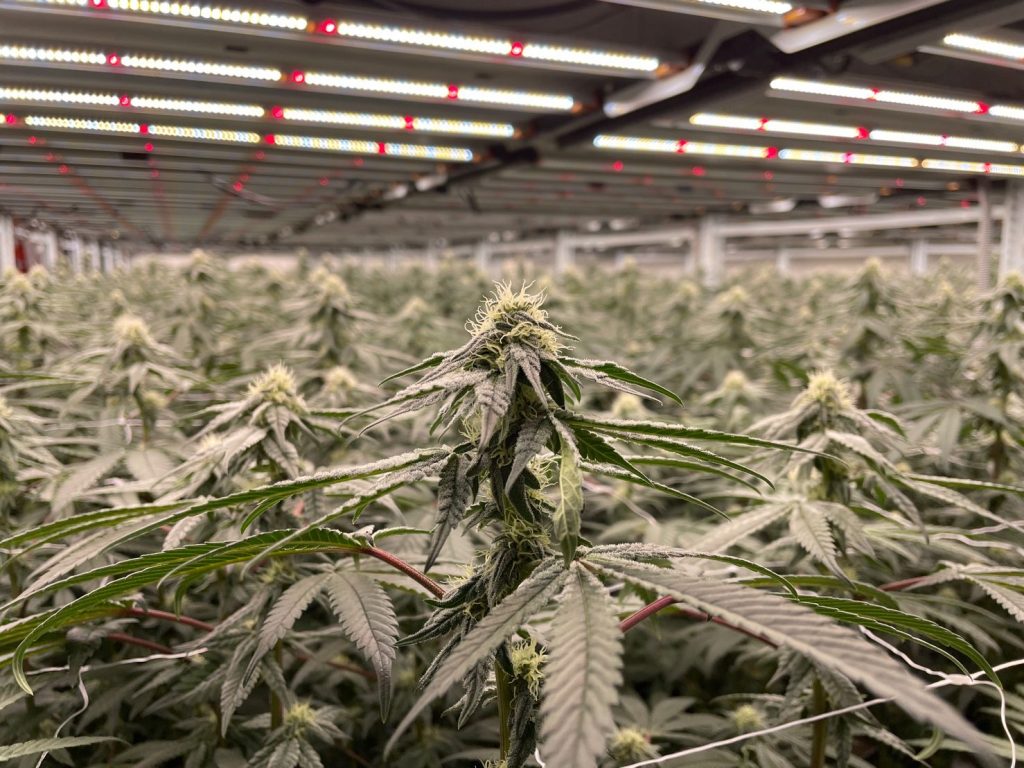
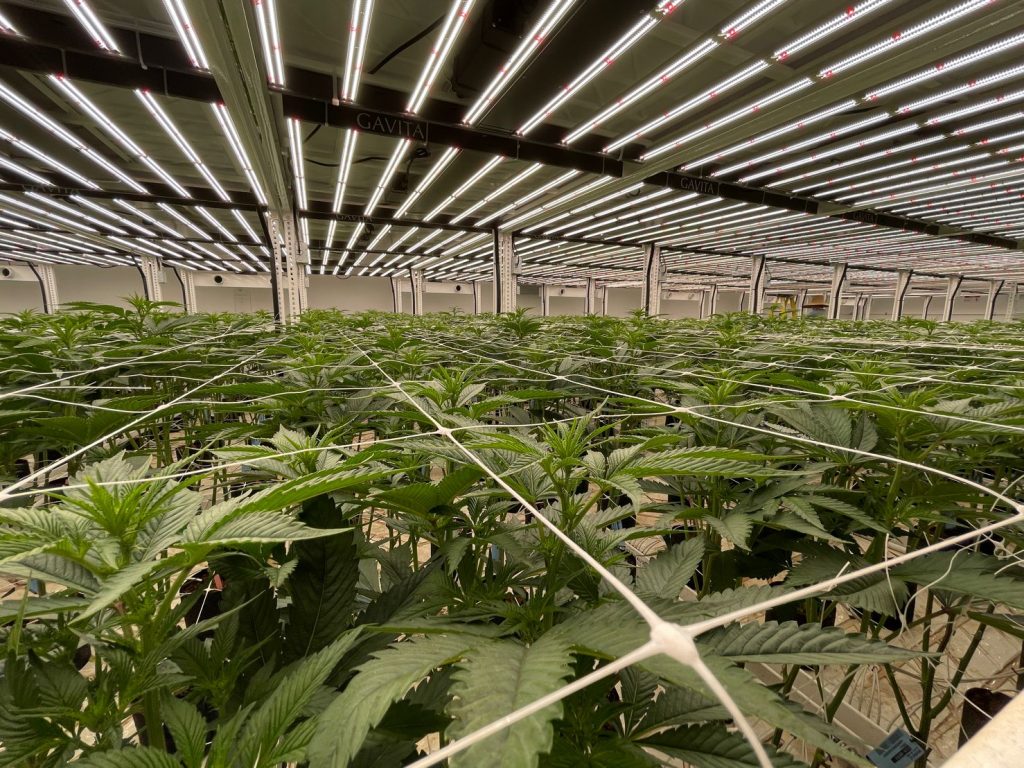
As the plants develop, they produce an awning of buds that glistens in the indoor grow lights, forming a “sea of green.” With proper plant training, nutrition, and care, you can successfully reap much yield per plant using SOG in a limited space within your indoor grow tent. 

How Much Does The Sea Of Green Plant Yield?

The amount of produce you can reap from a SOG crop depends on the number and types of cannabis plants you intend to cultivate. Once a SOG-grown plant reaches the flowering stage, it produces one large cola at the top. Apart from the routine plant training and fertilizing, SOG-grown cannabis plants only need a little extra care to produce buds.

Typically, small THC and CBD plants do not produce several colas, at least not as much as the average Sativa. However, when grown in a small space using the SOG method, they can yield as much as a ten-foot-tall Sativa. 

The secret to achieving impressive yield per square foot with SOG gardening is by maintaining a conducive grow space. Furthermore, small THC and CBD plants that are grown using the SOG method require the following growth factors:

  • Plant pots of appropriate size
  • The right type of soil (must be compatible with the cultivator)
  • Suitable environmental conditions
  • Reliable and lighting and durable lighting source
  • Water pH
  • Nutrients

As a cannabis grower, never underestimate the importance of these factors. If you can invest in them, you can reap bountifully out of your sea of green crops.