Should You Grow Plants Indoors Or Outdoors?

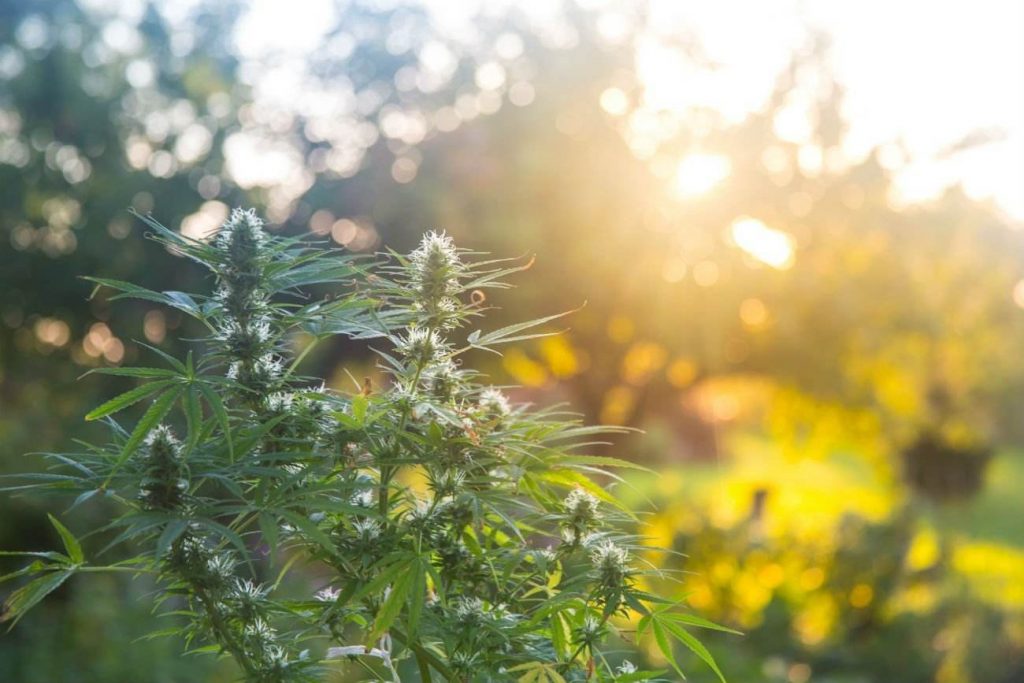
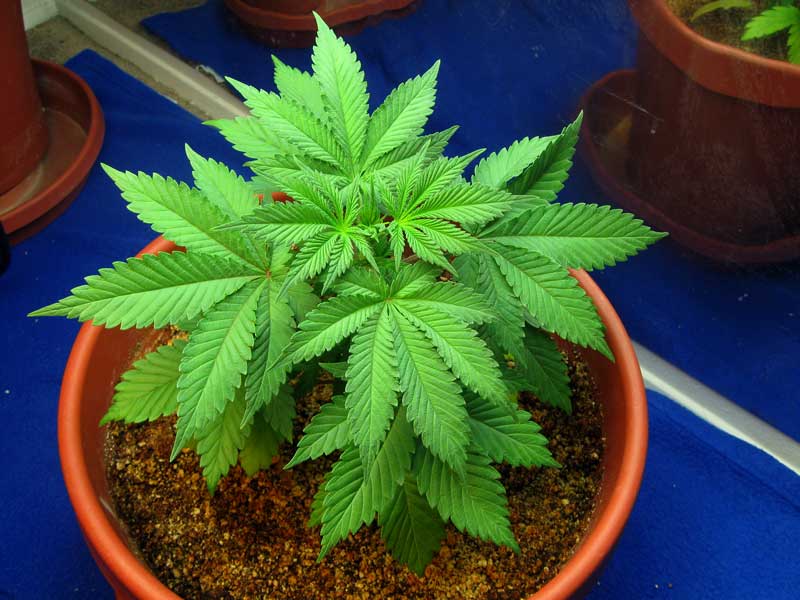
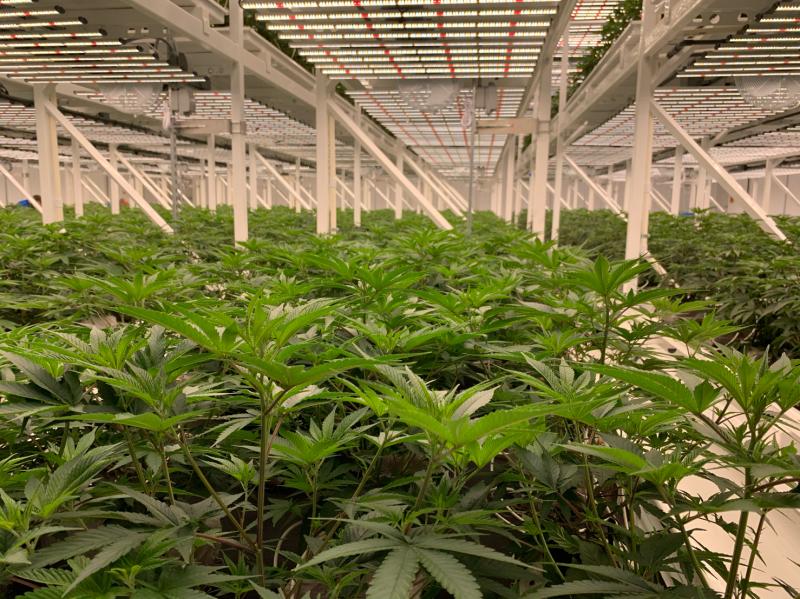
There are two major ways to grow marijuana, indoors and outdoors. Some people will use a mixture of the two and grow their plants indoors during the vegetative stage when they need constant light, then transport them outdoors when they are ready to start flowering and only need 12 hours of light a day.

Growing Marijuana Outdoors

Major Considerations:

  • Grow area must avoid detection for several months by potential thieves
  • Grower must have easy access to grow area and should be able to visit at least once a week
  • There needs to be a convenient source of water nearby
  • Area should be well lit by the sun and optimally have strong, direct sunlight from at least 10am-4pm (more is better)
  • The climate should have a warm growing season, the longer the better
  • Plants must be planted at a certain time of the year and often there can only be one crop a year (unless growing with autoflowering strains)
  • Longer Grow Time, typically Spring until Late Autumn.
  • Potential interference from bugs, animals, flooding, thieves, and other uncontrollable factors

Benefits:

  • Can be the easiest method since marijuana plants need less tending in their natural environment
  • Cheapest start-up and maintenance costs since there is free light and ventilation
  • Often bigger plants with bigger yields

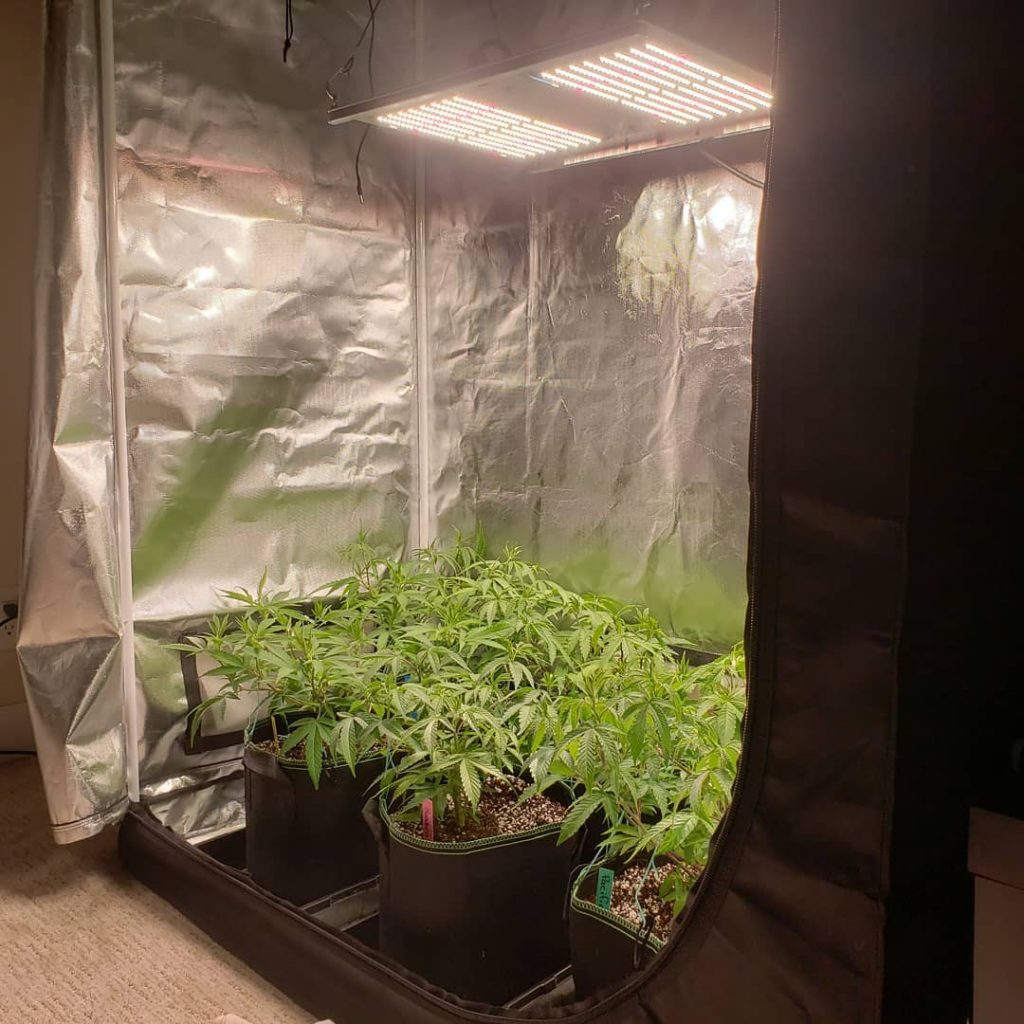
Growing Marijuana Indoors

Major Considerations:

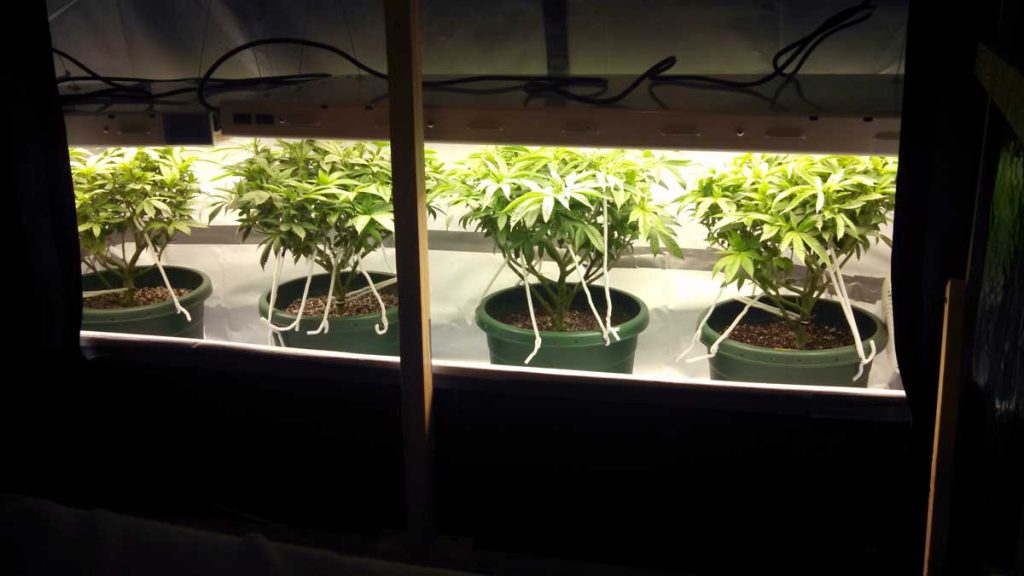
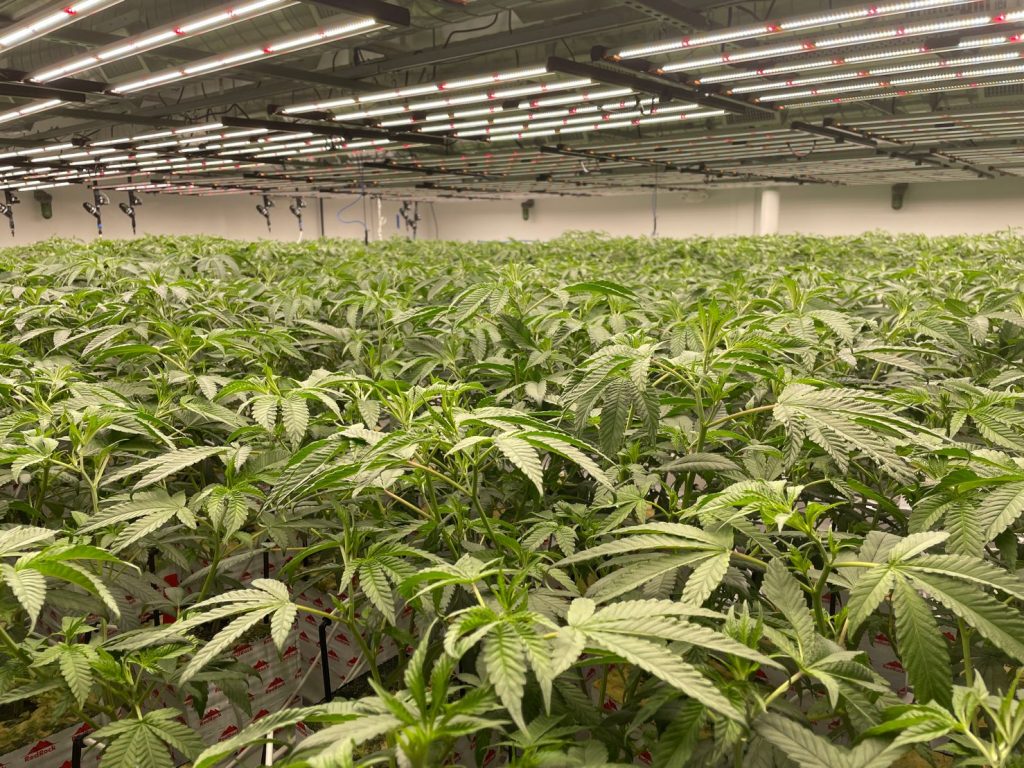
  • Must have enough room to grow indoors and be able to avoid detection
  • Start-up costs can be pretty high depending on grow system
  • Maintenance cost (electricity and nutrients) can get expensive depending on the grow system and number of plants
  • Must have good ventilation and keep grow area clean
  • More upkeep than growing cannabis outdoors

Benefits

  • Generally shorter grow time
  • Easier to be discreet and stealthy about growing (no visiting your grow site)
  • Ability to control all aspects of environment to produce consistently great bud
  • Not dependent on your climate
  • Can harvest many crops a year, including in the winter
  • Less likely to suffer problems from bugs, pests, etc
  • Able to grow plants around your schedule, instead of relying on the seasons
  • Many growers believe that indoor buds are the highest quality buds. In medical states, indoor buds are sold at much higher prices than outdoor buds.

Do Your Cannabis Plants Need Side Lighting

Is Side or Supplemental Lighting Worth It For Cannabis Growers?

When growing a cannabis plant indoors, light usually comes from a grow light located at the top of the grow space. This means all the light is beaming down on the plant from above. You may have noticed that by harvest time, buds close to the grow light are often the biggest. Should you give more light from the sides to increase the size of lower buds?

Does it make sense to add side lighting indoors? Can you copy the sun and give light from the sides to increase yields?

Is Side Lighting Worth It for Cannabis Plants?

So is side lighting worth it for indoor cannabis growers? The answer is unsatisfactory…

Maybe…

Side lighting can be helpful in certain situations, but it’s often unnecessary and may reduce yields/watt compared to adding light from above. Why is that?

It has to do with how cannabis plants respond to their environment. Although buds tend to grow bigger with more light, cannabis plants still favor the upper buds. A cannabis plant can “tell” which buds are at the top of the plant and puts more energy into these “high value” buds even when everything else is equal.

Even when cannabis gets the same amount of light from top to bottom, the top buds are still bigger. That’s just how cannabis plants roll. Cannabis plants naturally put the most energy into upper buds even when the plant is getting tons of light from the sides. Growers have competing theories about exactly why. Perhaps the top buds are most likely to get pollinated by the wind in nature.

To take advantage of this natural tendency, indoor growers often train plants to produce many top buds near the light (as opposed to adding side lighting). This ends up getting you more “bang for your buck” because you’ll get better yields/watt with free plant training than you would with side lighting.

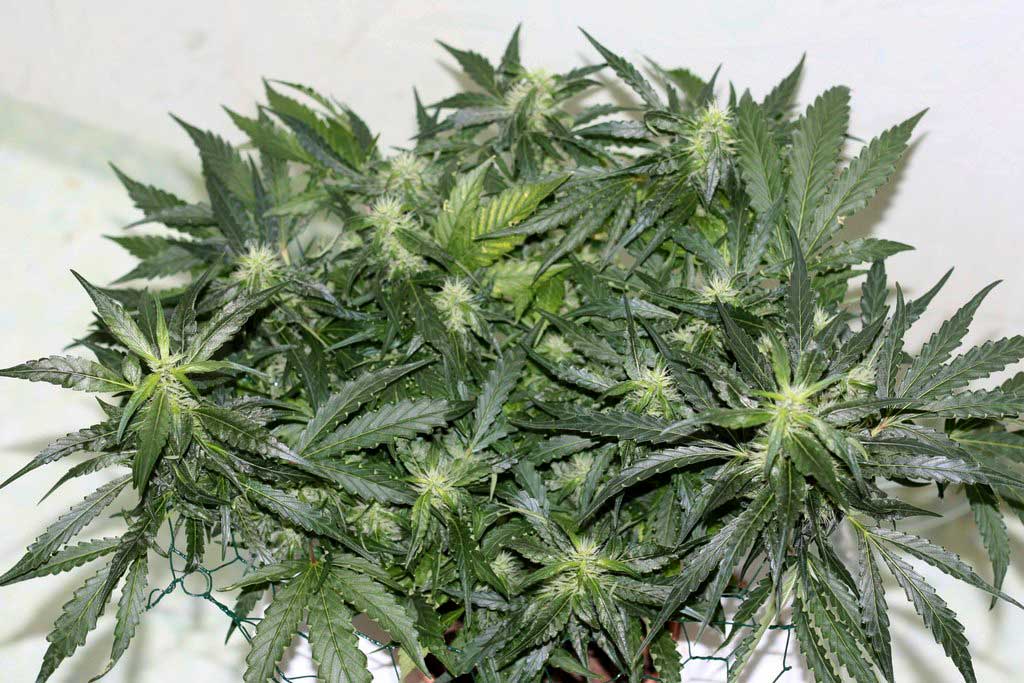
Because upper buds grow the biggest, growers often train their plants to grow bud sites on a flat, table-top shaped canopy. This puts more bud sites at the top of the plant close to the grow light. Growing “wide” cannabis plants with light on top results in better yields/watt than growing “tall” plants with the same amount of light on the sides.

Side Lighting vs Supplemental Lighting

  • Side Lighting means specifically targeting the sides of the plant with light to try to increase bud size on the sides.
  • Supplemental Lighting means you’re trying to increase overall light levels or change the light spectrum. Supplemental lighting isn’t about giving light from the sides; in fact, generally supplemental lighting is given from above the plant because that gives you more bang for your buck.

Supplemental lighting is common in greenhouses. If you have a spot in your yard that only gets good direct light for a few hours a day, or if you have a lot of cloudy weather at your location, you could supplement with extra light from a grow light while still taking advantage of the free light you’re getting from the sun.

Another common reason growers use supplemental lighting is to alter the light spectrum, or “color” of the light. Each light spectrum affects how your plant grows and some growers are using the power of LED grow lights (which allow you to choose the exact spectrum) to supplement either outdoor light or the light of other grow lights like HPS. These days it’s pretty common to see growers use LED grow lights to achieve a specific spectrum; it’s also common to see growers combine their LED panel with an HPS grow light to help get better yields and increased flower production.

Supplemental lighting can be a great choice in a lot of situations, but it’s not exactly the same as side lighting, which tends to be less useful most of the time.

What Causes Stress In A Cannabis Plant

Marijuana stress is caused by imbalances of the plant chemistry. Whatever the cause, the stress starts effecting the normal function of the plant and the plant will begin to show signs of problems.

Marijuana plants like to have a consistent environment which doesn’t change much from day to do. You will want to incorporate any changes slowly to avoid stressing your plant.

Main Causes of Cannabis Plant Stress:

  1. Water Stress: Over or under-watering will cause plant leaves to droop. An over watered plant has firm, downward curling leaves, while an under-watered plant looks wilted and dry.
  2. Nutrient Stress: When a plant is given too many nutrients, or not enough, then it starts showing signs of stress. This is caused by mineral imbalances which prevent the plant from carrying out it’s normal functions. Common signs of nutrient stress are burnt brown or yellow leaf tips, yellowing leaves or  other abnormal coloring/spotting, leaves falling off, and slowed growth. As plants get older, they need less nutrients and may be more likely to show signs of nutrient stress. An older marijuana plant will need less nutrients than a younger one.
  3. pH of Root Zone: pH is a measure of how acidic or alkaline a substance is. In order for your plants to get all their nutrients, their roots need to have an environment with the correct pH. If the roots are exposed to the wrong pH, they won’t be able to absorb all their nutrients and may start showing signs of nutrient stress. Therefore it’s important to check and adjust the pH of your water to maintain a proper root pH.
  4. Irregular Light Cycles: Marijuana plants need 18+ hours of light a day when they’re in the vegetative stage of their life, and a 12/12 light schedule when they are in the flowering stage. It’s important that any ‘start’ and ‘end’ times remain consistent thorughout the grow. It’s also imporant that the plants do not get any light during their ‘dark period’ of 12 hours during the flowering stage. When the plant gets light at inappropriate times, it’s possible that the plant will turn ‘hermaphrodite’ (show signs of being male even though it’s female). The light stress may also prevent the plant from providing the best yields even if it shows no symptoms.
  5. Plant Tissue damage: Any damage to the plant itself. Most times, if the plant is healthy otherwise, it will bounce right back from any physical damage. It’s inevitable that you will eventually damage one of your plants, so don’t beat yourself up about it too much.
  6. Root Health: Roots are the foundation of your plant, and it’s important that your plant’s root are given a proper environment. Roots can be hurt by light, physical damage, chemical damage, or certain kinds of bacteria. It’s important to provide the roots with an environment where they have ready access to oxygen, water, and the right amount of nutrients. As we mentioned earlier, roots should be maintained in the correct pH environment to ensure proper nutrient absorption. It’s a good idea to make sure the root zone never gets much hotter or colder than room temperature if you want to ensure that the roots are able to absorb the most oxygen out of the water. Maintaining a comfortable root temperature will also help prevent the growth of bad bacteria.
  7. Environmental Extremes: In general, your plant’s grow area should feel comfortable to you at all times. You want to try to maintain a consistent temperature if possible. If you think your grow area feels stuffy, hot, or cold, your plant probably does too. There should be good circulation/airflow around the plants, and the humidity should never get too high or low. When there are extreme changes in the environment, your plant may temporarily stop growing. If the environmental extreme worsens or doesn’t get better, your plants will start showing physical signs of stress and may even die.

How Tall Will Your Marijuana Grow&How Long Will It Take

Question: How tall should I expect my marijuana plants to get? And how long does it take until harvest?

  • How long will it take? 
  • How tall will it grow?

Answer: 

These are very common questions for new growers, so let us give you the straight answers…

How long will my marijuana plant take to grow? How long from seed to harvest?

It will be 8 weeks – 6+ Months before your plants are ready to harvest.

But that’s a huge range, right?

The truth is, the time to harvest depends on your growing method, whether you grow inside or outside, your strain, and your desired yields…

  • Growing Method – soil tends to be the slowest growing medium, and hydro tends to create the fastest growth.
  • Inside or Outside – In general, outdoor plants need longer to harvest than indoor plants. Outdoors, you plant in the spring, and harvest in late fall, taking 5-6 months or more. Indoors you have more control over the plant and can choose how long you want your plants to grow before harvest, and can get to harvest in just a few months. Indoors you can also start growing at any time (you don’t have to wait until Spring to start growing).
  • Strain – Some strains tend to have shorter lives, and others need longer before they’re ready to harvest. For example, you can choose to grow an auto-flowering strain to get to harvest in as short as 8 weeks. But many strains which originated near the equator can take months and months before their buds are ready to harvest, even when growing indoors. So strain is important when it comes to time-to-harvest.
  • Desired Yields – If you want bigger yields, you need a bigger plant, and that takes more time to grow than a small one.

How tall will my marijuana plants get?

Plants can be grown shorter than your knees, or taller than your house.

Basically you (the grower) are in complete control of how tall your cannabis plants grow.

This is especially true for indoor growers, where you are in charge of nearly everything. When growing outdoors, you still have a bit of control over plant height, but you are also at the mercy of the sun and the elements.

Some strains tend to grow tall and thin, while others tend to grow short and squat, but you can force your plant to grow differently when growing cannabis indoors. In fact, you have many options to control the exact shape and size of your plant.

You can achieve almost any size or shape when growing indoors as long as you use plant trainning. But if a cannabis plant is left to grow outside with tons of sun and without any plant training, the sky is the limit for how big they can get!

Although it isn’t the be-all end-all when it comes to size, strain is still definitely something to keep in mind when it comes to height. Although you can control the exact height and shape of your plant no matter what the strain with plant training, different strains grow differently and you want a strain that makes it easier to get the results you want. When growing with bagseed (seeds that you find in your buds) you often don’t know what to expect until the plant actually starts growing.

To fight these natural tendencies and force these plants to be the same height, the grower would have needed to use different techniques and training strategies.

7 Reasons Why Cannabis Plants Grow Slow-Part IV

After introducing 7 common reasons why cannabis plants grow slow, is there any way we can make it grow faster? Yes of course! In addition to watering, humidity, and temperature factors, we also need to consider the following aspects:

Gentle Air Circulation – You probably know if it seems stuffy in your grow space. Plants, like humans, enjoy a gentle breeze to go along with their warm, sunny day. Air circulation prevents hot spots while ensuring plants get plenty of access to fresh air. Fresh air contains CO2, which is crucial to photosynthesis (making energy out of light). As a result of fresh air and great air circulation, plants not only grow faster with stronger stems, they are more resistant to white powdery mildew, bud rot, fungus gnats, spider mites, and other unwanted visitors.

Quick Cheat Sheet to Fixing Environment

  • Fans – Fans equalize the temperature and humidity between two areas by moving air around. Just remember that they cannot alter the overall temperature or humidity. For that, you’ll need….
  • Humidifier – Raises temperature, raises humidity
  • Swamp cooler/evaporative cooler – Lowers temperature, raises humidity
  • Dehumidifier – Raises temperature and lowers humidity
  • Air Conditioner (AC) – Lowers temperature, lowers humidity

3.) Optimize Your Grow Lights

Choose a quality grow light and keep it the recommended distance away from your seedlings for the fastest growth. If the light feels hot on your hand where your plants are, it definitely should be moved further away. We recommend LED grow lights. It is becoming more and more popular, which is a trend.

LEDs – LED grow light technology has improved by leaps and bounds over the last decade but especially in the last 2-3 years. There are good and bad brands out there, but many newer LEDs are designed specifically for growing cannabis. The best LEDs produce captivating bud quality and yields, so the brand you choose is important. Aokairuisi LED grow lights have been strictly tested and passed CE, ROHS certification in Europe and UL certification in the United States. Therefore, when buying Aokairuisi grow lights, people do not need to worry about quality. View some good options: Shop

4.) Seeds / Genetics

Start with Good Genetics – Start with good seeds/clones for the best results. Old seeds, found seeds, and unhealthy clones can result in slow-growing plants. On top of that, certain strains tend to germinate better or grow faster than others. That means you’ll get the fastest-growing plants if you start with tested genetics from a trustworthy breeder.

5.) Respond Quickly to Problems

Look at your plants for at least a minute or two every day. It’s really easy to overlook problems if you just water them and go. Taking a minute to really look at each plant and its leaves will often reveal problems right as they’re starting.

Take 2-3 minutes each day to look for…

  • Drooping
  • Leaf spots or discoloration
  • Bugs or webbing
  • White patches or mold
  • Curling or twisted growth
  • Yellow or brown leaf tips

Although just pay attention to the overall color and appearance of plants. If your plant seems “off” to you, it probably is. Healthy leaves are green without discoloration. If leaves look sick, don’t ignore it! Figure out why. As long as you react quickly, you can solve almost any problem without growth slowing down much, if at all.

Happy Growing!

7 Reasons Why Cannabis Plants Grow Slow-Part III

We’ve introduced 6 of the 7 common reasons why cannabis plants grow slow in the previous blogs. Last but not least: Sometimes plants want to be left alone. We’re going to share ways to make cannabis grow faster too.

7.) Sometimes Plants Want to Be Left Alone

Unfortunately, you can “over-love” your plants. Overwatering is so common among new growers because they are trying to give something good to their plants and get a little carried away.

Sometimes plants need to be left alone. There may be days or even weeks where they really don’t need anything from you besides water.

If you’re wondering why plants are growing slowly, yet you’re constantly messing with plants, touching them, bending them, defoliating, etc., you may need to give them a break until they start growing fast again. Fast-growing vegetative cannabis plants can handle almost anything, but when a plant is growing slow you should focus on providing a good environment, just the right amount of nutrients/water, and staying hands-off until it’s recovered.

How to Make Cannabis Plants Grow Faster

Now that you know what may be causing the problem, get the solution. Follow these principles and your plants will be growing inches a day!

1.) Watering

Proper size pots – Much easier to avoid over or under-watering if plants are in an appropriately sized pot. Seedlings grow fastest in small pots where they’re less likely to get waterlogged, while older plants want bigger pots to spread out their roots. 

Good drainage – Soil or coco should not seem muddy, dense, or thick. Water should be able to drain freely from the bottom of the pot (if there aren’t any drainage holes, you need to add some yourself). Learn about growing in soil or coco. 

Aim for watering every 2-3 days – Giving just enough water at a time so you can water every 1-3 days produces the fastest growth. Watering every day produces excellent growth but you have to be careful not to give too much at a time. It takes a delicate dance to avoid overwatering when watering that often. We recommend aiming for every 2-3 days for beginners since there’s less room for error.

Plant pots should be feeling a little light and the top soil should be dry or mostly dry by the time you give water again. If you’re giving so much water at a time that it takes 4+ days for your grow medium to dry out, you likely will achieve faster growth by giving less water at a time. However, some growers prefer a hands-off approach to growing and may not mind plants growing a bit slower if it means they get to water less often. If you need to water more than once a day, the plant is begging for a bigger pot! 

Nutrients and PH – Make sure your plants are getting the necessary nutrients. As far as pH, some growers get lucky and happen to have perfect water for cannabis plants. However, if your plants are struggling and you don’t know why, the pH being high or low is one of the most common reasons. If your plants are struggling and you haven’t checked the pH at all, get a PH Test Kit and do that first. It’s super simple to adjust the pH (just add “PH Up” or “PH Down” to your water), you just need to know how much to add, and you can’t find that out without testing!

2.) Environment

Humidity – Keep humidity around 50% RH for the fastest possible growth. Plants can grow at higher or lower humidity levels, but some plants struggle because humidity affects how well water moves through the plant. Since each leaf is constantly giving off water vapor, it’s more common for growers to struggle with high humidity than low humidity, but it still goes both ways.

  • Dry air under 35% RH can limit plant growth, and under 25% RH may even cause deficiencies and other odd symptoms
  • High humidity above 70% often makes plants droopy and slows down growth. In the flowering stage, high humidity can cause buds to grow more fluffy.

If your air is dry, you may consider turning down any fans to help keep humidity pockets near your plants, though that can only do so much. If the air is really dry, you may need to add a humidifier (raises temperature and humidity) or swamp cooler/evaporative cooler (lowers temperature, raises humidity).

If you’re struggling with high humidity, you may need to add an exhaust fan to vent out humid air and bring in fresh air. If your plants are in a grow tent, typically an exhaust fan that’s set up properly can keep the humidity just a little higher than in the room. If the humidity is much higher in the grow space than the surrounding room, that means you need to help equalize the air with an exhaust/intake fan, or by blowing the air around. If the humidity of your actual room is high, no amount of fans can fix that. In that case, you’ll need either a dehumidifier (raises temperature, lowers humidity) or an AC (lowers temperature and humidity) to bring the RH into a better range. 

Temperature – Cannabis seedlings and young plants love when it’s warm but not hot. Plants typically grow the fastest if the temperature stays around 73F at night and 79F during lights-on. Under LEDs, keep it just a bit warmer, 74F at night and 80F during lights-on. Plants can definitely grow well when it’s a bit warmer or cooler, but you tend to get the fastest growth in that temperature range.

To be continued…

7 Reasons Why Cannabis Plants Grow Slow-Part II

As mentioned in the last blog, there are 7 common reasons why cannabis plants grow slow. We’ve introduced the first three reasons, and for the third reason “unhappy roots” we have more to say.

Overwatering is most common when you have a small plant in a big pot because the roots aren’t drinking much yet. Luckily, this can be overcome with proper seedling watering practices. Yet even if you’re watering plants perfectly, a poor draining grow medium (such as thick muddy soil, or a pot without drainage holes) will still trigger root problems and slow growth due to lack of oxygen at the roots. 

The following symptoms of droopiness and yellowing are the result of a thick grow medium, small plant in a big pot, and chronic overwatering.

Overwatering– This seeding is almost a month old but it’s stayed small due to being watered too much and too often.

Underwatering is less common but may be even worse for seedlings. Underwatered seedlings grow slow, stay small, and often have a dark coloring. When plants don’t get enough water, they grow slowly and may turn dark green.

If your plant stays in a too-small pot without any room to spread out its roots, growth slows and plants stay small. If you start seeing droopiness and deficiencies on a plant that has been in the same pot for a while, it may be root bound (the roots have wrapped around the edges of the container). This causes symptoms similar to over/underwatering but is difficult or impossible to overcome with watering practices.

With a heavily rootbound plant, you may need to transplant to a bigger pot to stop the symptoms. Just remember to avoid disturbing roots during transplant (try to keep roots in a solid bunch and put the rootball directly into a hole in the new medium) so you don’t unintentionally stress the roots from being moved around too much.

4.) Nutrient Deficiencies

Seedlings started in soil won’t need nutrients right away, as they can find nutrients in the soil. However, if the pH at the roots is too high or low (6-7 pH is ideal for soil), plants can’t absorb the nutrients properly because nutrients take a different chemical form at high or low pH ranges.

Plants grown in coco or hydroponics need to receive nutrients in the water from when they’re seedlings. Because plain water and coco don’t contain significant amounts of nutrients, the only nutrients plants get are the ones you give them. That means if you’re not giving any nutrients, the plants will grow extremely slowly and eventually turn yellow. Coco and hydro growers also need to adjust the pH of their water to ensure nutrients are absorbed properly. In coco or hydro, the optimum range is 5.5-6.5 pH.

If you’re seeing nutrient deficiencies, chances are your plant isn’t growing as fast as it could. This seedling is growing slowly due to an iron deficiency caused by high pH at the roots (it’s also overwatered, which isn’t helping).

5.) Bugs or Other Pests

Unfortunately, plant pests like broad mites, spider mites, thrips, or even a ton of fungus gnats can slow down growth as the plant spends energy repairing the damage. Sometimes growers mistake the symptoms for a nutrient deficiency or other problem. If you’re noticing spots, patches, or anything unusual on your leaves, don’t ignore it!

Broad mites cause leaves to almost look shiny;

Spider mites much on your plants and create small yellow specks all over your leaves. You may also see webbing.

Thrips also make speckles on your leaves, though they appear in irregular patches as opposed to individual specks.

Fungus gnats look like tiny flies buzzing around your soil and usually aren’t too serious. Just water the plant less often. However, in big numbers, they will hurt plant growth, especially on smaller plants. The following symptoms are caused by an extreme fungus gnat infestation.

6.) Genetics & Natural Variation

Genetics make a difference. Some strains simply germinate and grow faster than others. On top of the genetics, seed storage matters. Older seeds tend to germinate slower and plants are often slower growing at first. Seeds stored in extreme temperatures may also be harder to germinate and easier to stunt.

Even if genetics are the same, you can give the same care and end up with different growth rates between plants. For example, if you take multiple clones and grow them in the same garden, some will grow faster despite the fact their genetics are identical. That’s just the way nature works. So if you’re noticing only one plant growing slowly, while all the others seem fine, that’s a sign you may just have a runt on your hand. It might have nothing to do with you!

Even when plants have the same genetics and are grown in identical conditions, sometimes you end up with runts. That’s a natural part of growing and it may not be your fault.

To be continued…

7 Reasons Why Cannabis Plants Grow Slow-Part I

Why are plants staying small? You plant your seeds, seedlings appear, but plants are growing soooooo slow. It’s a common problem with seedlings and vegetative plants, but often frustrating to figure out the fix. What’s the cause? How do you make plants grow faster?

This tutorial will help you overcome the 7 main causes of sluggish growth, so your cannabis plants grow blazingly fast! You’ll learn how to make plants grow fast and healthy.

Note: This article is about slow-growing seedlings and vegetative plants. 

7 Most Common Reasons Plant Growth is Slow

Here are the 7 most common reasons your seedlings or young plants are slow-growing:

1.) Grow Light

Plants tend to grow slow if they’re not getting enough light overall. If slow growth is combined with long, lanky seedlings, your plants need more light. In that case, either increase the power of the light, bring it closer, or get a bigger grow light. One recommendation: Foldable Strip Plant Grow Light Six/Eight/Ten Bars Full Spectrum

You can also give plants too much light. Powerful grow lights cause stress and can slow down plants if they’re kept too close. Too much light (when the grow light is too close) results in stress and unusual symptoms that can slow down plants.

2.) Extreme Environment

Cannabis plants enjoy a warm sunny day. Not too dry, not too humid. Similar to humans, actually. Certain strains are more resistant to an extreme environment, but plants grow best in moderate humidity and warm-but-not-hot air. A good temperature range is warmer than 70°F (21°C) at night and around 79°F (26°C) during the day. Humidity around 50% is perfect.

Temperature

  • Cold daytime temperatures below 60°F (15°C) may slow growth down to a crawl, and freezing temperatures can kill.
  • Heat above 85°F (30°C) can also slow down growth or even slay plants if it stays too hot for too long

Humidity

  • Dry air under 35% RH can limit growth, and under 25% RH you may even start seeing signs of deficiencies on the leaves and other odd symptoms
  • High humidity above 70% can make plants droopy and slow down growth by making it harder for the plant to move water efficiently through the plant

Seedlings have the most trouble dealing with a poor environment, while older plants tend to be more resistant to temperature and humidity.

This seedling is struggling to cope with a hot, dry environment. For the fastest growth, keep the temperature around 79°F (26°C) during the day and a little cooler at night. Optimal humidity is around 50%.

Cold temperatures can also stunt plants or make them grow at a snail’s pace. This plant experienced a cold night under 50°F/10°C and was droopy the next morning. It took several days for the plant to recover and start growing normally again. To make things worse, cold temperatures cause plants to drink less, so they’re more likely to suffer from symptoms of overwatering when the temperature falls.

Note: Although fans help equalize the temperature of your grow area, too strong a breeze can slow down seedling growth. Leaves should be gently rustling but you shouldn’t see stems waving around in the wind. If that happens, turn down the fan or point it in a different direction.

3.) Unhappy Roots

Unless you’re growing in a hydroponic setup, chances are your plant roots are hidden from view. Yet roots affect plant growth just as much as the environment aboveground. When the roots are unhealthy or unhappy, a plant languishes and stops growing. When roots are getting what they need, a plant can grow inches a day.

The most common cause of unhappy roots is overwatering, especially for seedlings and young plants. Overwatering is typically the result of giving too much water at a time, or watering too often.

But isn’t water good for the plant? The problem is that roots also need oxygen, which they typically get through air pockets in the soil. If the soil gets waterlogged from too much water without any pockets of air, the roots start “drowning” from lack of oxygen. The lack of oxygen is what causes the symptoms of drooping and slow growth.

In hydroponic growing, oxygen is provided to roots through bubbles. That’s why hydroponic plants don’t get droopy even though their roots live directly in water.

To be continued…

7 Tips To Improve Cannabis Bud Quality-Part II

From previous blog, we’ve introduced the first 3 tips to improve cannabis bud quality. They are: Start with Top-Shelf Genetics; Give Your Cannabis Lots of Light and Nutrients to Increase Bud Quality. Let’s start to check more tips!

4.) Better Taste, Better Smell – Increase Terpene Content

The smell and scent of cannabis buds are produced by plant chemicals known as “terpenes” (also “terpenoids”, which are a class of terpenes).

Terpenes contribute to the flavors of many household spices (like cinnamon, rosemary, cloves and ginger) and help create the scent of most flowers.

The unique combination of terpenes and terpenoids produced in cannabis flowers (buds) cause most of their taste and smell as well.

There are a variety of ways to increase the terpene content of your buds so you produce cannabis that tastes and smells great, and there are also a couple of common mistakes you should know about that can actually ruin the taste and smell of your buds.

5.) Maintain Proper Temperature and Humidity

Temperature

Maintain daytime temperatures around 65-80°F (18-26°C) in the flowering stage unless you’re using CO2 which does best at around 80-90°F (26°-32°C). However, even if you’re using CO2, most growers recommend you back off and bring the temps down to 65-80°F for the last two weeks before harvest.

Night temperatures should be kept around 68-75°F (20°-24°C) for most strains. Too-cool temps increase the chances of bud rot, which thrives in the 60°F (15°C) range, and freezing temperatures can actually damage or even kill your plants.

However, if you’re growing a strain that turns color, keep in mind that some of these strains will only show their color when night temperatures are at least a few degrees cooler than during the day in the flowering stage.

Some strains need slightly cooler night temperatures before their buds will turn colors.

Humidity

Humidity stumps a lot of new growers and causes several unexpected problems.

Maintaining higher humidity during the vegetative stage will reduce salt levels within the plant while encouraging healthy and lush growth.

During the vegetative stage, if humidity drops below 40%, especially anywhere below 25%, it can cause problems that look like nutrient deficiencies or light/heat stress!

But in these cases, just adding a little moisture to the air does wonders, even if you don’t change anything else.

During the flowering stage, your cannabis plants actually prefers less humidity!

Decreasing moisture in the air (lowering the humidity) during the flowering stage helps prevent mold and actually may increase trichome production in your buds! For best results, keep humidity 40%-50% during the flowering stage.

Lower humidity levels in the flowering stage helps promote trichome production, which increases the amount of “glitter” you see on buds.

The truth is, you can successfully grow your marijuana plants in high or low humidity, even if growth isn’t perfect. This is the primary reason why many growers – especially new ones – forget about humidity altogether.

New growers also tend to hastily spend money on CO2, supplements or expensive nutrients when controlling the humidity in their setup could make a much bigger difference in their final product.

So if you’ve realized that your humidity is far higher or lower than what’s recommended, you may be able to make a simple, relatively cheap change to dramatically improve the vibrancy of your plants.

For growers in really dry or humid areas, it can make a big difference to buy a humidifier/dehumidifier and make sure they’re always providing the optimum humidity levels.

And there’s one more insider trick you need to know about humidity: So you know you need to keep humidity in 40-50%RH range for the flowering stage, but there is one extra trick… Use a dehumidifier to drop the humidity down as low as you possibly can for the last 2-3 weeks of flowering.

This extreme dryness will encourage the buds to seal and protect themselves with additional resin (in other words, a sparkling outer layer of THC-heavy trichomes).

As an added bonus, this trick also gets your buds prepped for a successful, mold-free drying process because your buds have already given up some of their moisture.

6.) Make Sure Grow Room has Strong Air Flow & Good Ventilation

This is yet another factor having to do with air quality (we already listed temperature and humidity).

Over time, any grower (especially indoor growers) will see that great air quality is a big contributor to star-quality buds. Air flow and ventilation are essential if you want to create perfect air quality.

For 1-3 plants smaller to mid-sized plants, you’ll probably be fine with an oscillating fan or two. With a big grow and hot lights, you’ll need a better exhaust system to ensure proper airflow, but it can be easy to set up!

7.)  Master the Basics – Especially Drying & Curing

You probably know that in order to get the best results, your plants need to make it through the majority of their lifecycle without major problems.

But although your growing methods are incredibly important, one of the most important things to focus on is when you harvest, as well as the process of drying/curing your buds after harvest.

In fact, the things you do during and after harvest, including drying/curing, makes up almost 50% of your final bud appearance!

Drying/curing the right way will make buds smell better, look better, be more dense, and buds will actually feel more potent!

If you haven’t really been paying attention during the drying/curing part of your grow, you should focus here for the greatest gains in quality!

Drying buds slowly and then curing them in glass mason jars for 2-4+ weeks helps “tighten up” buds so they are more dense. Curing also intensifies smell and increases potency!

To Sum it Up:

Learn everything you can, start with good genetics and create the perfect growing environment to produce the best buds!

7 Tips To Improve Cannabis Bud Quality-Part I

Have you ever had weed that knocks your socks off? The kind of cannabis buds that people brag/warn their friends about? We’re talking about the really really good stuff! The truth is, you can successfully grow cannabis with very little effort, make a ton of mistakes, and still harvest buds that will do the job.

But have you ever wondered how people grow truly top-shelf buds? The kind of bud that beats the marijuana you get in a dispensary?

If so, you’re in luck, because today we’re going to teach you 7 tips to consistently growing top-tier quality cannabis buds with effects that will stick in your memory for years to come. Plus, we’ll teach you how to make your cannabis look pretty!

1.) Start with Top-Shelf Genetics

It’s really tough to get truly top-shelf buds if you start with mid-grade seeds, clones, or the dreaded bagseed; you’re giving yourself a much higher chance of disappointment because no growing method can overcome genetics!

These buds were both grown in the exact same setup at the same time, but have different genetics. Look how differently the buds turned out! Choosing the right strain lets you choose the looks and effects you want!

When you first started growing, you would grow any seeds you could find. These would usually grow pretty well but the resulting weed never ended up being as good as the buds you found them in. And sometimes the buds would be airy and not-that-potent.

Getting your genetics from a reputable breeder is key to producing gorgeous and potent buds!

According to one of our customers, just switching to better seed stock caused a dramatic increase in his yields without any other changes. But even more importantly, the quality of his harvests drastically improved. Not to mention the freedom of being able to choose which strain you want to grow instead of hoping to find a good seed in your buds!

Clones are still a great way to start a grow with good genetics, but you have to make sure you always get clones from a trustworthy source!

If you want to take your quality to the next level, don’t start with just any clones or seeds. Search for the right, true quality genetics and don’t be afraid to research to make sure you’re getting exactly what you want! Good seeds cost more than bagseed, but the money you pay for quality is worth it, especially when you consider what you’re getting in return!

2.) Give Your Cannabis Lots of Light!

If you want great bud, you have to provide plenty of light!

When you start a grow with good genetics – from good seeds or clones – your plant has the potential for a high level of quality (yields, potency, resilience). However, it’s nearly impossible to get your buds to reach that potential if you use lights that are underpowered.

For example, there’s no amount of plant trainning or growing skill that can make up for the amount of light produced by an incandescent bulb; the bulb simply doesn’t have what it takes to do the job.

Strong, bright light is what powers the growth of buds in the flowering stage – light is like “food” for your plants!

When it comes to indoor cannabis gardening, more light is better…to an extent. If you give your flowering cannabis plants all the light they can handle without giving them too much, it increases your potency, density and yields.

Strong, bright light is a crucial part of reaching a strain’s full potential! Strong light is incredibly important for the highest bud density, potency and yields.

You can find some excellent grow lights here: Shop

3.) Nutrients to Increase Bud Quality

First, before adding any special supplements, you need to make sure you’re giving your plant the correct base nutrients in the flowering stage.

Base Nutrients in the Flowering Stage

  • Low Nitrogen (N) – Give your plant relatively low levels of Nitrogen, especially in the second half of the flowering stage when the plant has stopped growing vegetatively and buds are fattening up. The plant needs a lot of Nitrogen for vegetative growth but doesn’t need nearly as much for making buds. In fact, too much nitrogen in the ripening stage can discourage bud production and hurt your yields.
  • Plenty of Phosphorus (P) – Phosphorus is incredibly important to flower production and giving plants plenty of Phosphorus in the flowering stage will help increase the total number of flowers
  • Potassium (K) – Potassium is often overlooked compared to Phosphorus (which is often considered a bud booster) but Potassium may actually be even more important! Providing a good source of Potassium increases the size and density of each individual flower.

In general, when it comes to feeding nutrients in the second half of the flowering stage, less is more! Keeping nutrient levels low can also improve the taste of your final buds because high nutrient levels are associated with a chemical taste to the buds.

Giving cannabis the right ratios of nutrients during the flowering stage will greatly increase the quality of your bud!

To be continued…